


Photos (the new iPhoto ) is designed to appeal to a broad audience, with simple editing tools that let anyone improve their photographs. But is that it? Even though it’s a 1.0 product (replacing iPhoto and Aperture), a lot of editing power is actually hidden beneath that user-friendly surface.
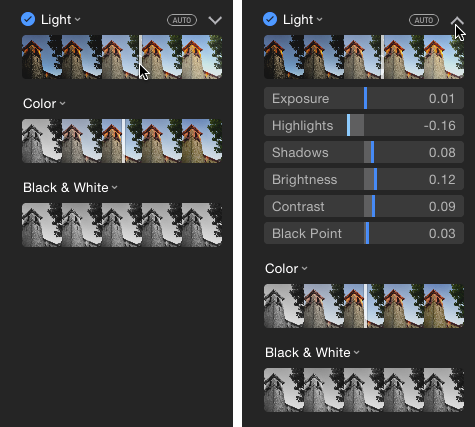
For example, when you edit a photo and click the Adjust button, you’re presented with sliders for improving light and colour. Dragging a slider makes the image brighter or darker (Light), or more or less saturated (Color); you can also click the Auto button that appears when the mouse pointer moves over the tool. Clicking the down-facing arrow icon, however, exposes individual controls.
That’s just the beginning.
Get into editing
To access the editing view, normally you click the Edit button when viewing an image, but there’s a better way: simply press the Return key. This shortcut also works in the Moments view when a photo is selected.
Shortcuts also go directly to specific tools, even if you’re not yet in the editing view. Press C to open the Crop tool, F for filters, A for the Adjust tool, R for the Retouch tool, and E for the Red-eye tool. While you’re editing, press the arrow keys to switch to the previous or next photo without leaving the editing view.
To compare your edits to the original version of the photo, press the M key for a quick before-and-after.
You can choose which version to edit
If you shoot with your camera set to Raw+JPEG format (which records both a raw image and a high-resolution JPEG version), Photos treats the two separate images as one. However, the application defaults to editing the JPEG instead of the richer raw version.
To switch, open the photo in the editing view and choose Image > Use RAW as Original. (The option is disabled unless you’re in the editing view.)
And add more adjustments
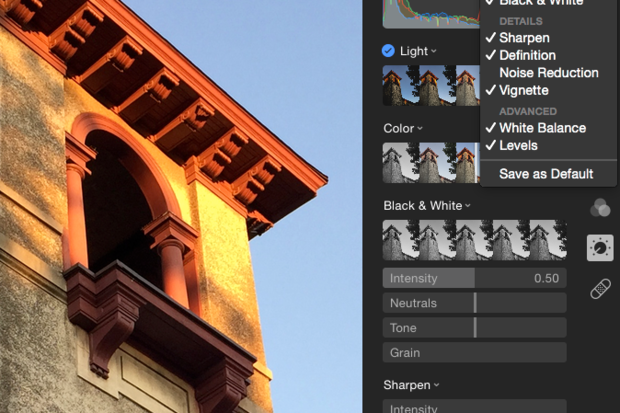
The Light, Color and Black & White adjustments in the Adjust tool are just the most common adjustments. Several more are available by clicking the Add menu (see image below). I find having the Histogram visible to be helpful, for example. If you use some controls regularly, such as White Balance, choose Save As Default at the bottom of the Add menu; those adjustments will appear every time you edit a photo.
Multiple levels of Levels
The Histogram is good for identifying the colour and tonal values in a photo, but it’s there just for reference. The Levels adjustment, however, lets you manipulate those values in some sophisticated ways. Choose Levels from the Add menu to view it.
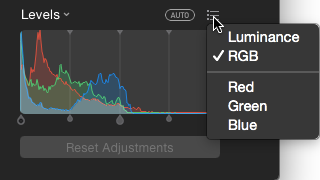
Looking at a histogram, the left side represents dark values (with black at the far left) and the right side represents light values (with white at the far right). The coloured areas within indicate the distribution of red, green and blue (RGB) pixels within the scene. If you want to isolate and edit any of those channels, click the options menu that appears when you move your mouse cursor over the controls. You can also choose Luminance to view only the brightness values.
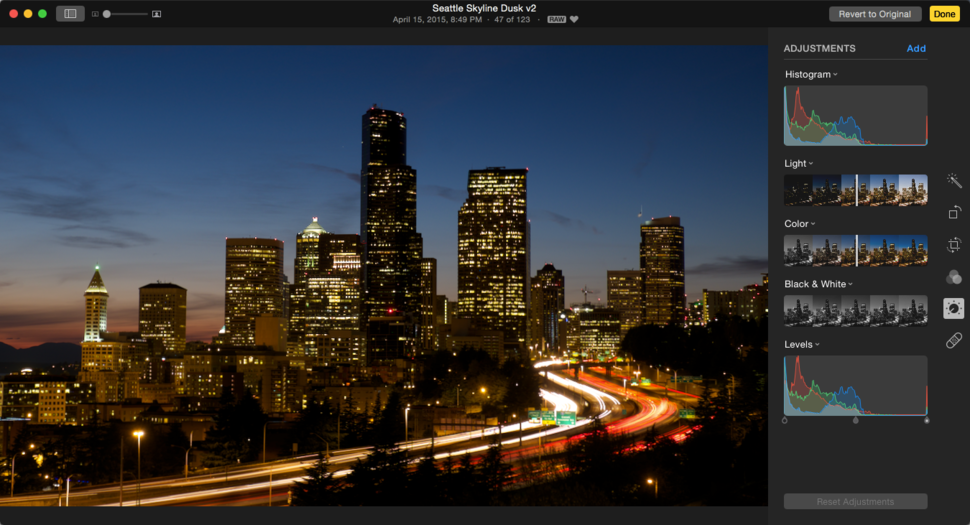
The teardrop-shaped handles at the bottom of the Levels histogram control (from left to right) the black point, midtones, and the white point. To brighten an image, for example, drag the white point to the left – the values to the right of the white point get pushed to their full luminance, increasing the overall brightness of the photo (see below).
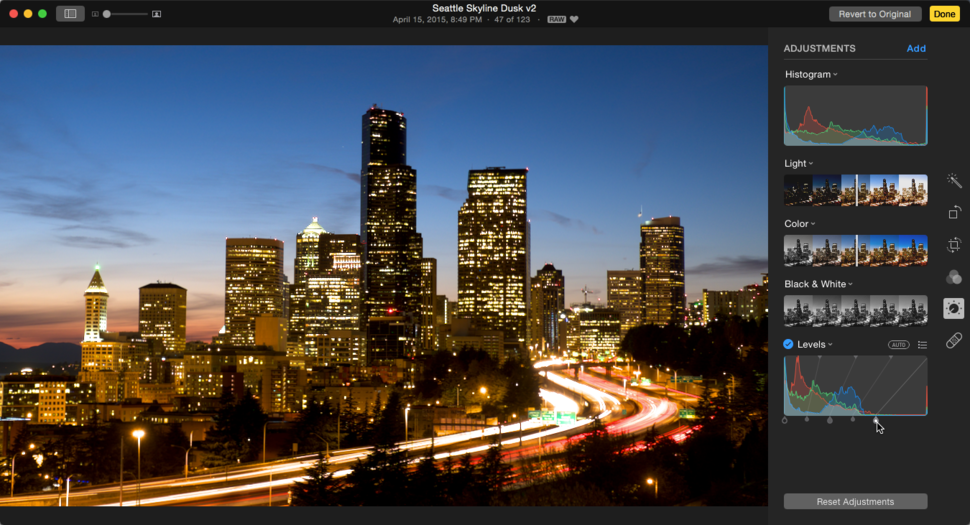
Similarly, dragging the black point makes the image darker, and dragging the midtones lightens or darkens the values that fall between the light and dark extremes; the smaller handles that flank the midtones control affect shadows (left) and highlights (right). Sometimes, for instance, it may be better to adjust the midtones to brighten an image to avoid clipping, which is when pixels are pushed all the way to pure white or black.
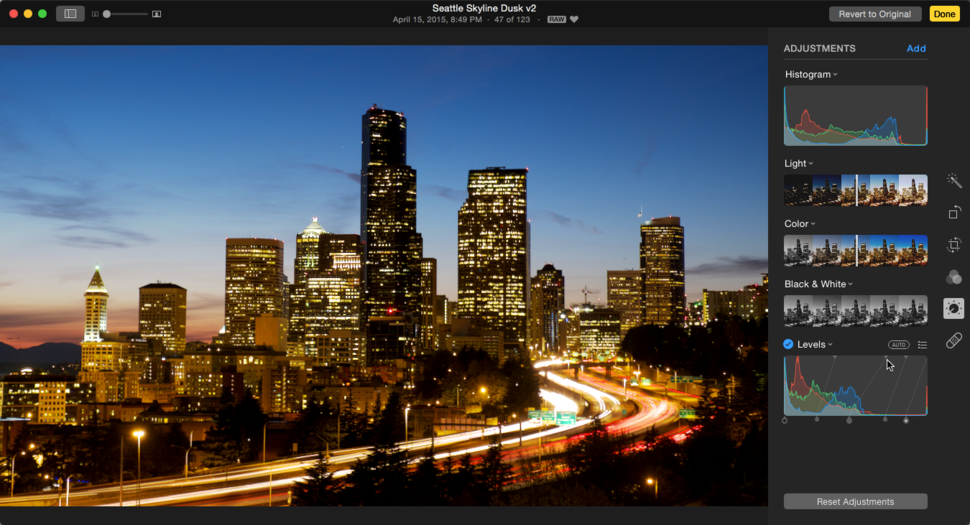
There’s more to the Levels adjustment, however. The handles at the top of the Levels adjustment allow you to fine-tune the edits made with the bottom handles. In the image below, I’ve reduced the white point setting (by moving it to the right) so the lightest areas aren’t blown out, and then also dragged the top-centre control to brighten the midtones. The result is a brighter, more saturated sky, but also detail in light areas such as the pyramid-topped building in the center of the skyline. You can also hold Option and drag a top handle to also move its connected bottom handle in unison, maintaining the relationship between the two.
Copy and paste adjustments
After you’ve edited a photo to your liking, you probably have similar shots taken at the same time that would benefit from those adjustments. Rather than try to replicate everything by hand, it’s much easier to copy the work you did on the first one and paste it onto another.
While you’re still in the editing view, choose Image > Copy Adjustments (or press Command-Shift-C). Next, switch to the unedited photo and choose Image > Paste Adjustments (or press Command-Shift-V). All the changes you made to the first apply to the second.
Looking ahead
These advanced or hidden editing features exist in the current 1.0.1 version of Photos for OS X, and there’s more to come. An update arriving with the upcoming OS X El Capitan will support editing extensions: third-party developers can create modules that will enable you to edit your images within Photos for OS X using the developer’s tools. This capability already exists on iOS – you can use the editing tools of Pixelmator or Camera Plus, to name just two examples, without leaving the Photos app on your iPhone or iPad.
For now, though, Photos for OS X turns out to be a much more capable photo editor than it first appears, which is a good place to start moving forward.
All this looks good but it still does not have as many options as Aperture does yet!
Mac Repairs Sydney , Paddington ,kings Cross , Darlinghurst , Surry Hills ,Bondi ,Elizabeth Bay , Potts Point and Inner City . Emergency , Same Day Service ,Fast Turnaround . Drop off at Studio at Taylor Square or Call outs available also.
Open Late Everyday and weekends !